JACOBSIMEONE.NET
Chapster the Chapstick Robot
Published: 2024-05-19
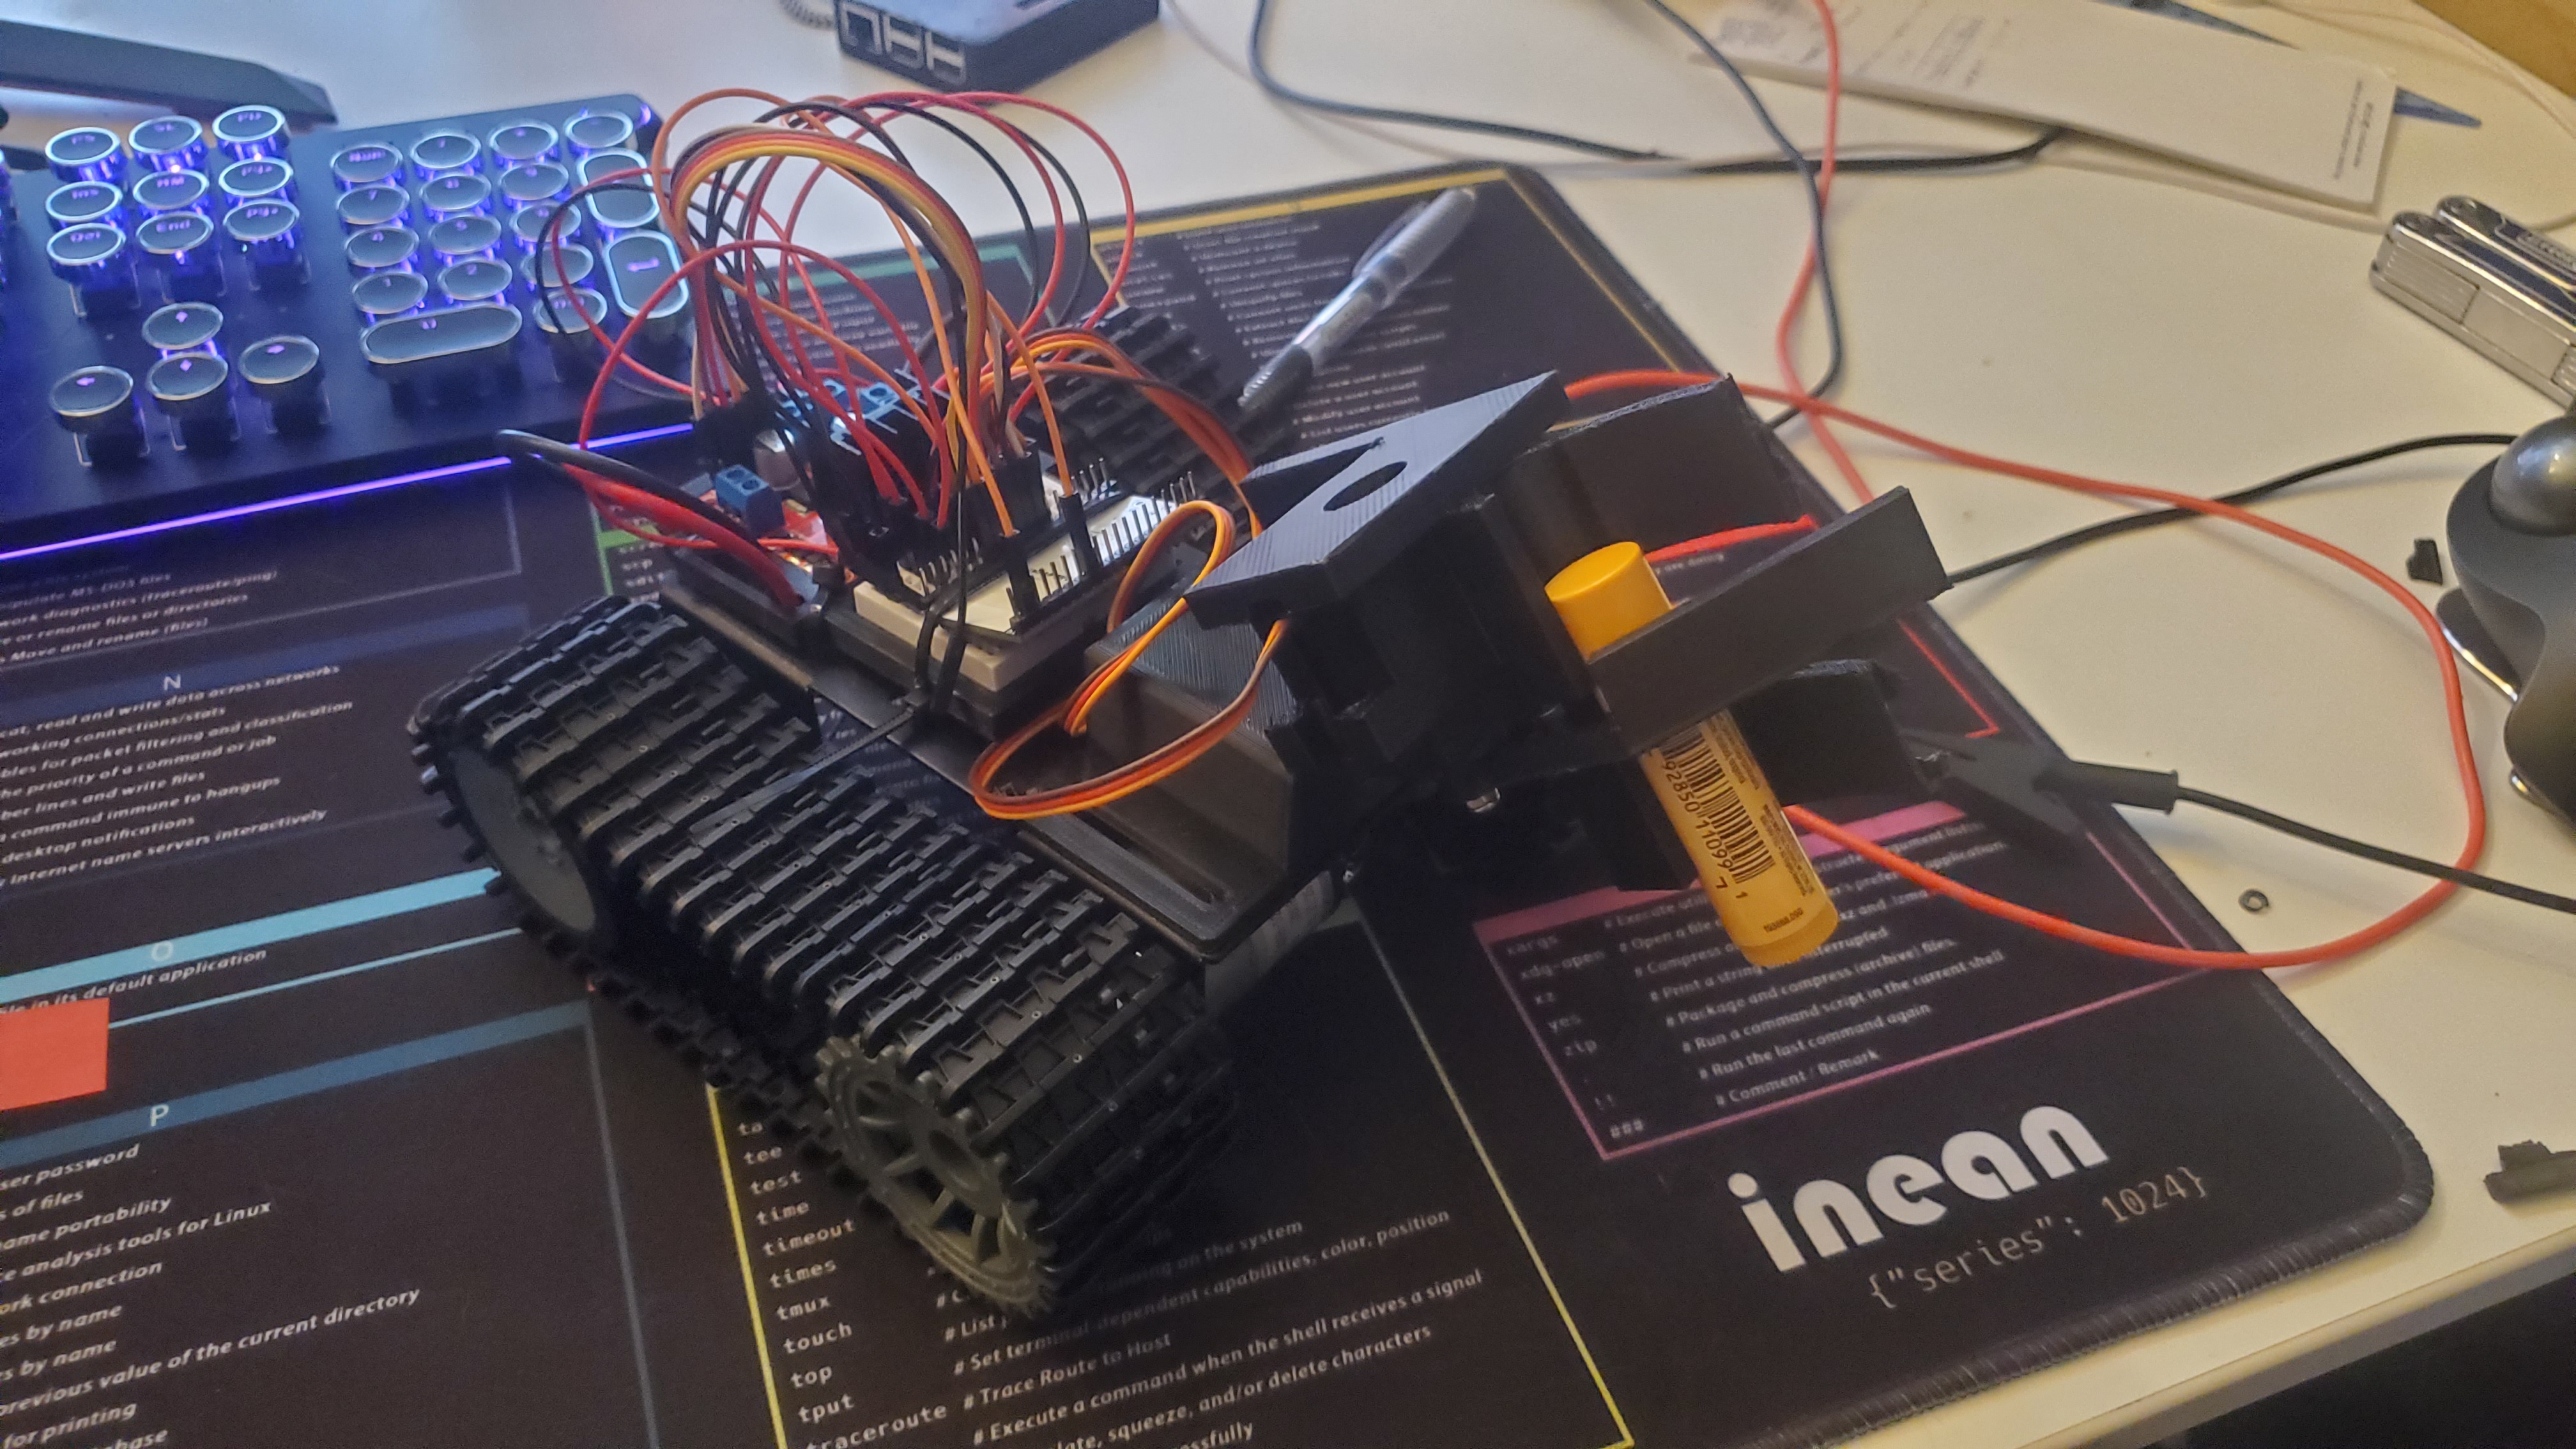
A Chapstick Robot
“Chapster” the chapstick robot was designed for one sole purpose: retrieve chapstick from across my desk and move it 3 feet closer to me. Chapster was an exercise in both simple robotics, as well as an introduction into the MQTT protocol, and its use for controlling simple robots.
In this post, I will go into some detail into how I built the robot, what the various components do, and what the outcomes of this project taught me.
The Brain
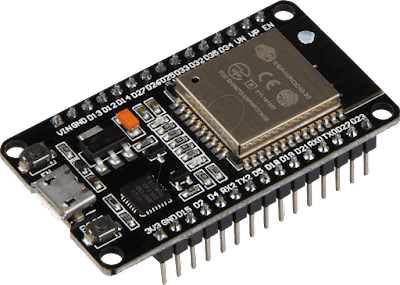
Every robot needs some sort of controller to orchestrate all the complex signals that make it work. In my case, I chose the ESP32 microcontroller, for it’s wireless capabilities as I will be connecting it to my WiFi network to use the MQTT protocol.
The Brawn
Chapster needs a way to get around, and to lift the chapstick off of a surface in order to bring it closer to me. In this project, I used a couple brushed DC motors, and a couple servos to achieve this.
Motors
Chapster’s drivetrain is made up of two brushed DC motors, and a L298N motor driver.
I’m sure we are all familiar with the notion that motors turn electrical energy into rotational energy which then moves things. In our case, we want to move a track. But what does a motor driver do?
The role of a motor driver is to turn logic-level signals coming out of a microcontroller into signals that can deliver enough power to move the motors, and in turn, move the robot. I’ll explain:
You may be tempted to hook up a motor directly to a controller’s GPIO pin, like so:
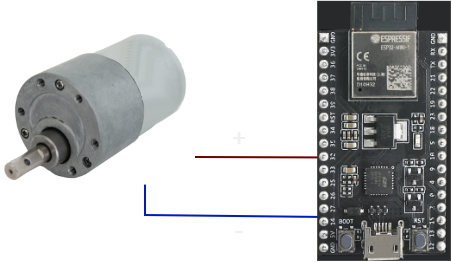
Well… this won’t work for most motors. Sure, you would see it turn, maybe, but there are a couple problems with this approach:
Voltage Differences
Especially in my case, the logic level of the GPIO pins on a microcontroller are not nearly the same as the motor’s voltage. For instance, I’m using motors that are designed to operate at 6V nominal. Logic levels on an ESP32 are roughly 2.64V given a 3.3V VDD supply. Note that it’s usually fine to under-volt a motor, but 2.6 ish volts on a 6V motor is going to sub-optimal to say the least, if it even runs. Even if the controller we we’re using had 5V logic, we run into the next problem…
GPIO Pins Cannot Typically Source Enough Current to Supply a Motor
Motors take significantly more current (Amps) than other devices like LEDs, or LCD screens that you may be used to running of microcontrollers such as Arduinos or ESP32s.
For instance, the maximum source current of GPIO pins for a couple different microcontrollers are:
- ESP32: ~20-40 mA
- Arduino Uno: ~40 mA
That’s no where near enough to supply a motor that may take anywhere from 500mA-1200mA in my case (measured by eye while running motors under load)
Enter Motor Drivers
Motor drivers are essentially a beefy transistor that switches the power to (in our case) a brushed, DC motor. This allows us to use a separate power supply for the motor, while still switching it using a controller. A very popular choice in the “Arduino” world is the L298N dual H-Bridge motor driver, and it’s various carrier boards:
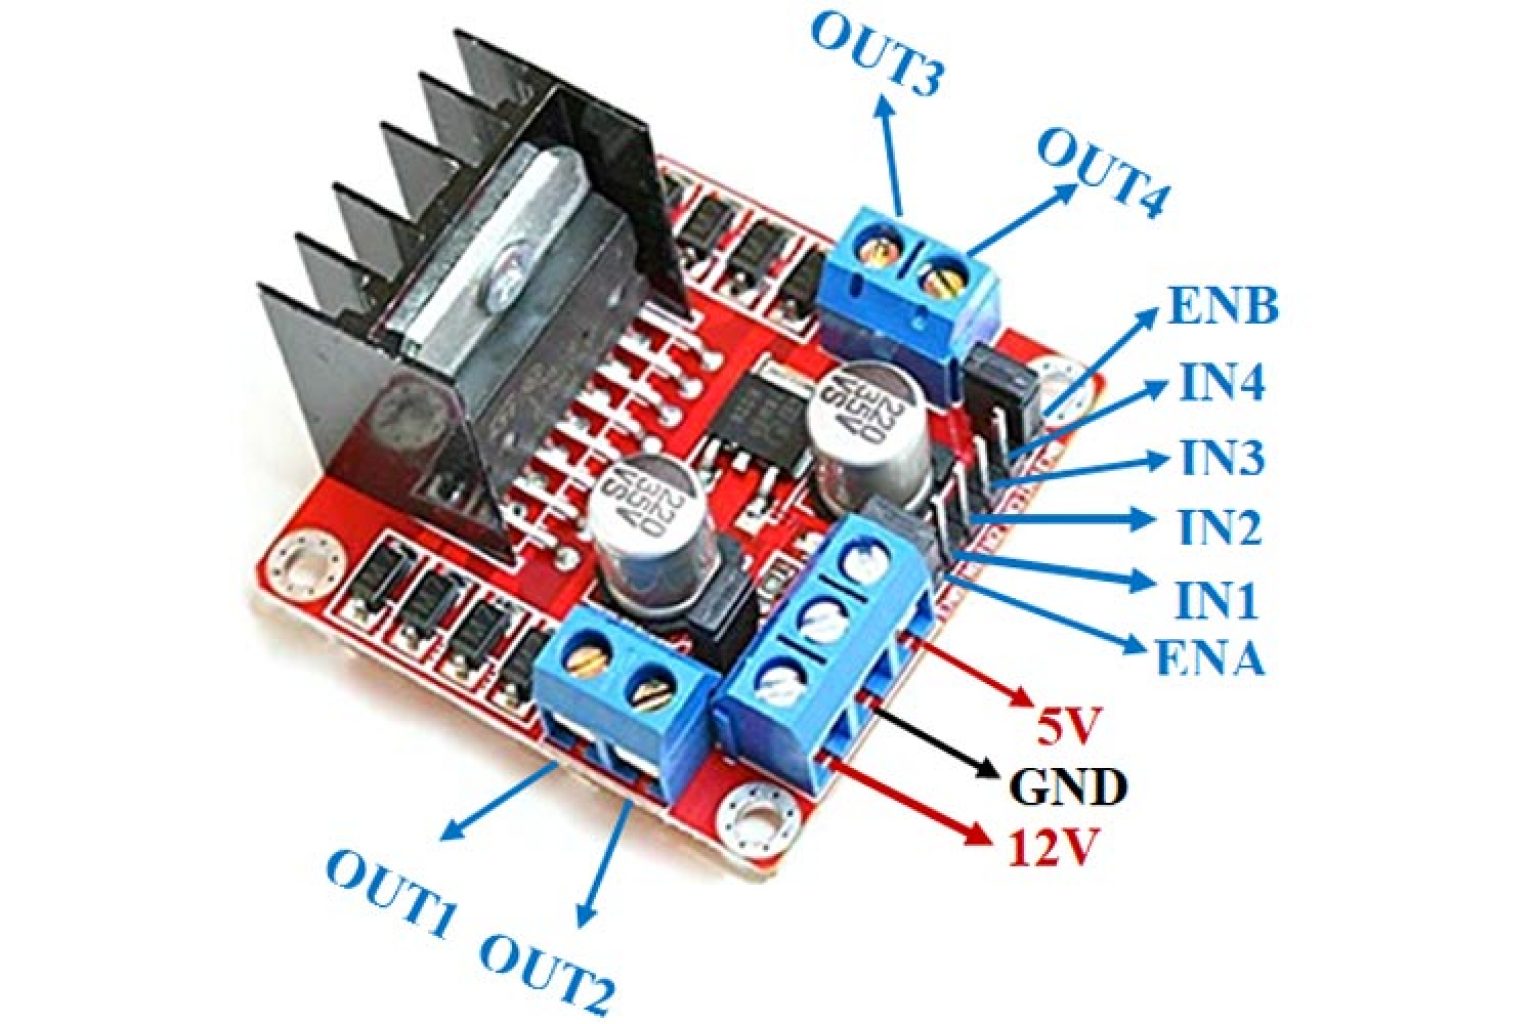
This changes our circuit to look something like this:
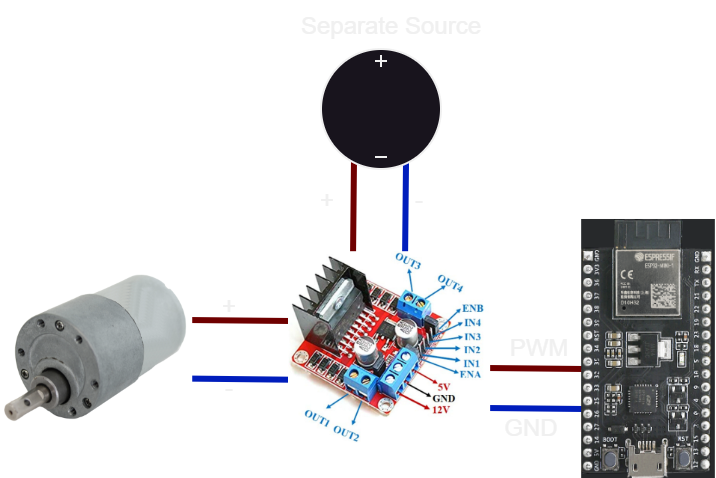
And this is how chapster works! Just with one more motor. Now, we can use the separate source to control the motors with a PWM signal from the ESP32 controller, keeping the controller safe from hungry motor currents!
Moving Chapster a Given Distance
Moving a robot a particular distance using a motor is not at all a new problem, but I thought I would attempt to solve it in a unique way. For this project, I didn’t feel like spending money on encoders, or motors with integrated encoders. This was a project about MQTT and software after all, with only the goal of moving some chapstick a few feet across my desk.
I decided to attempt to profile the motors, and how fast they moved the robot’s drivetrain given a fixed distance. In the end, this method did not work out due to mechanical inconsistencies in the drive train, but maybe could work for other robotics systems.
First, I performed a lot of tests on the motors, figuring out how long it took for the drivetrain to travel 30cm across my desk mat. I found 3 tests to yield an exponentially decaying curve:
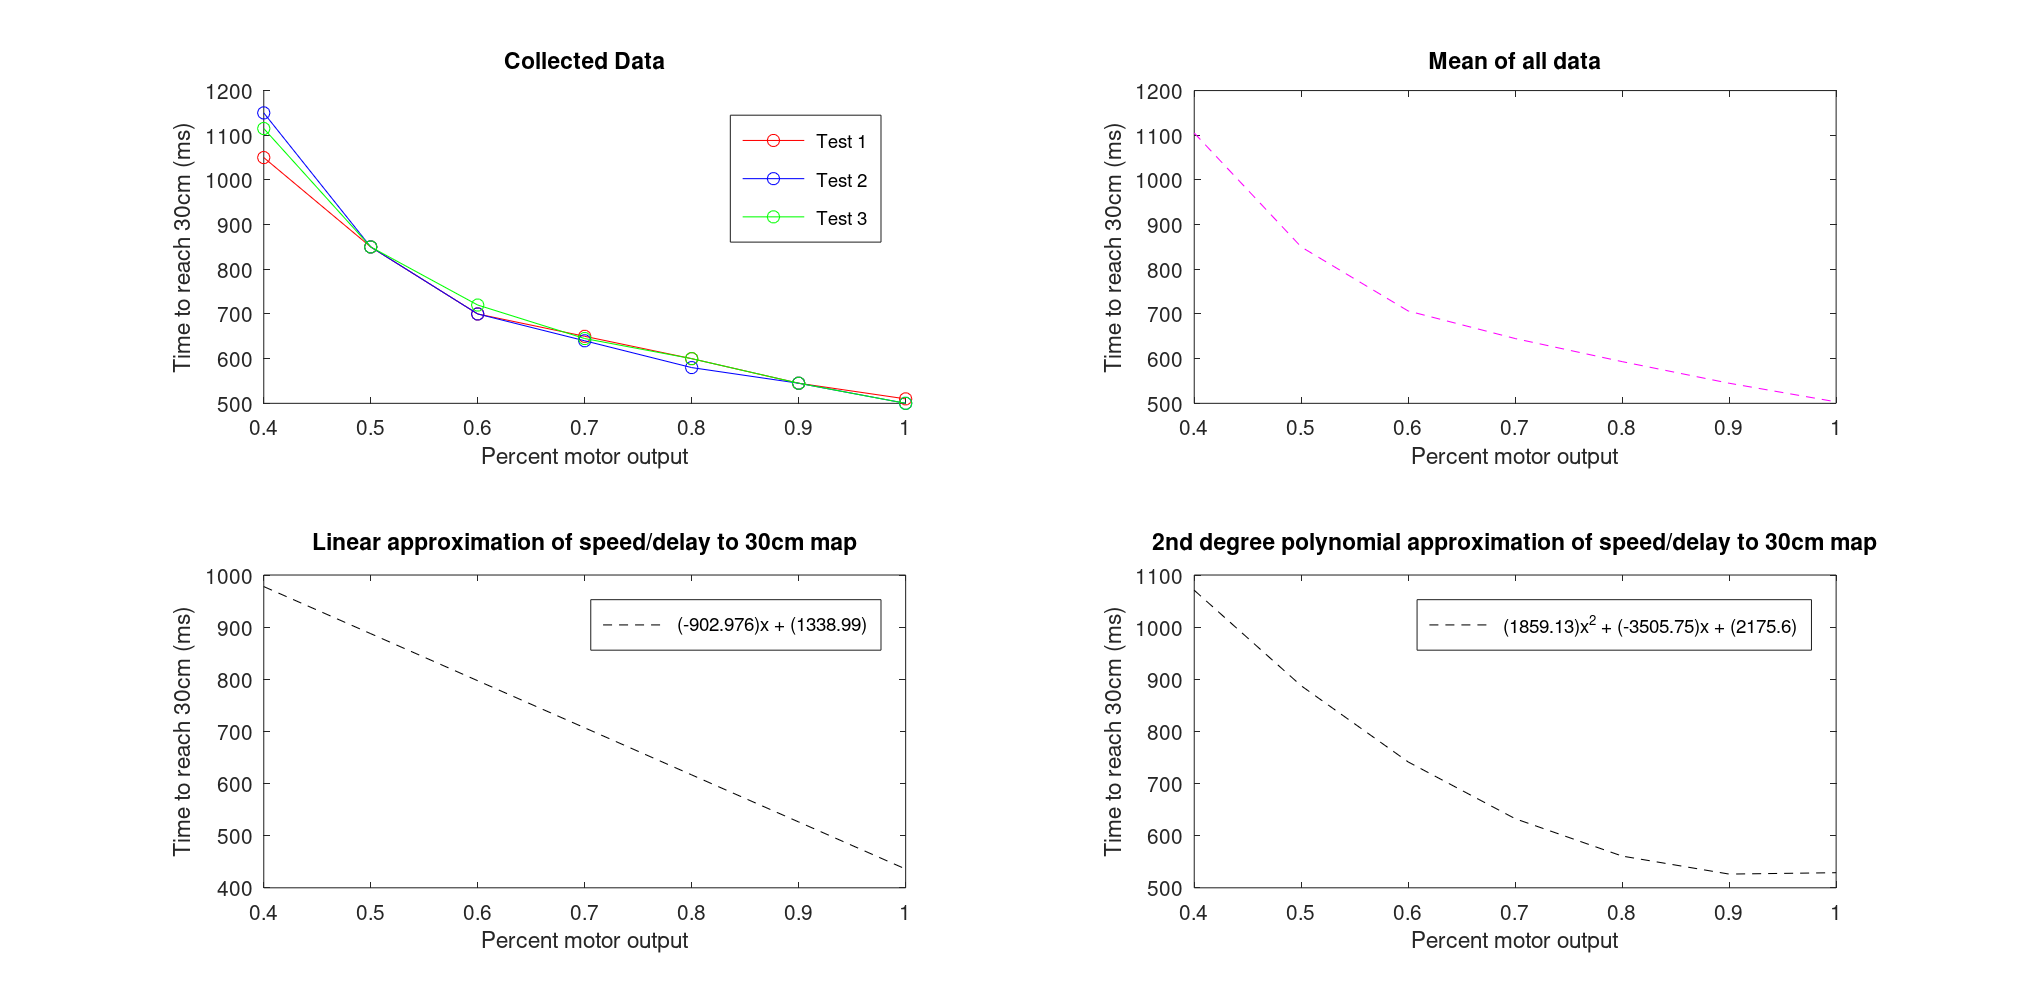
I approximated the motor mapping function with a 2nd degree polynomial, which is what the firmware originally used to attempt to travel a fixed distance.
This worked for… about 10 minutes, until the mounting hardware that was responsible for keeping the motors on tightened or loosened, making it easier or harder for the motors to turn the wheels, causing all of my careful plotting to go out the window, as the different sides of the robot would lag or lead because of varying resistance in the drive wheels.
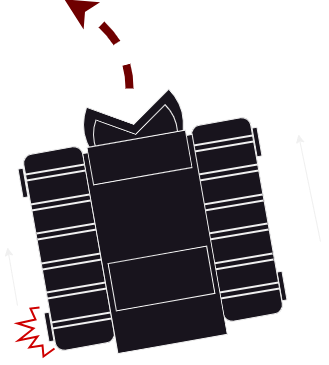
In the end, the robot just moves forward at a set speed when it receives a “go forward” command.
Servos
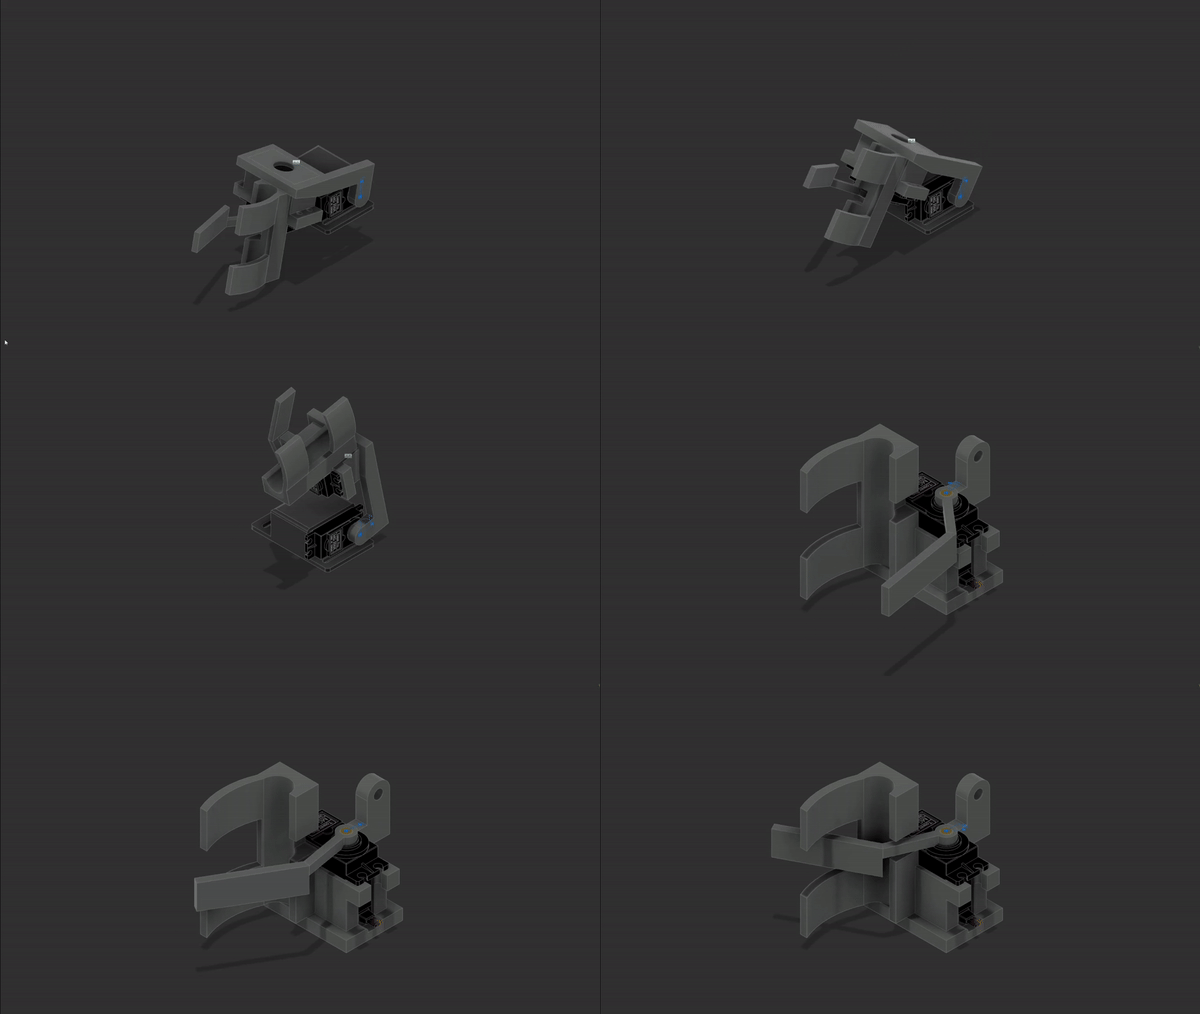
The claw on the robot needed to be actuated, both up and down, and closing & opening the claw. Note that this motion is not a continuous rotation, like needed out of motors, but moving a rotational axis to set positions. This is a situation where servos are very useful.
In my case, I chose two of these MG996R servos to actuate the claw part of the robot:
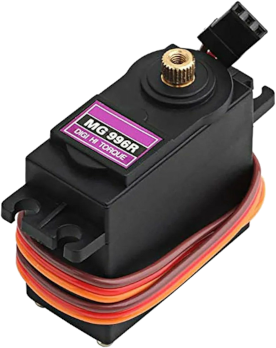
They are located on the claw, and using a PWM signal generated from the ESP32 controller, they will open, close, lift, and lower the claw:
Software
This project uses an ESP32 microcontroller, programmed using the Arduino Framework, with PlatformIO as my IDE. Note that it is also possible to use the Arduino IDE to write software for the ESP32.
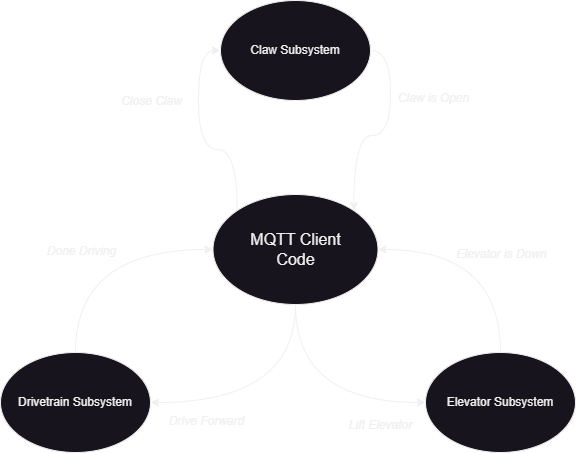
The software is split up into subsystems, the Drivetrain, Claw, and Elevator. These three subsystems contain functions to control the peripherals of the robot. These include functions like: Drive(), DriveDistance(), ElevatorUp(), ClawClose(), etc. This is how the firmware interacts with the hardware on the robot. An example diagram of how the software works is similar to below:
The other side of the firmware is the MQTT receiving code.
What is MQTT?
MQTT is a light-weight, efficient pub-sub protocol used widely in IoT to transmit data between MQTT clients. MQTT is most widely used in cases where the client (some data source) does not always carry a direct connection to the broker (data handler). This is unlike client-server models, where clients maintain a connection to the server at all times.
This looks a little something like this:
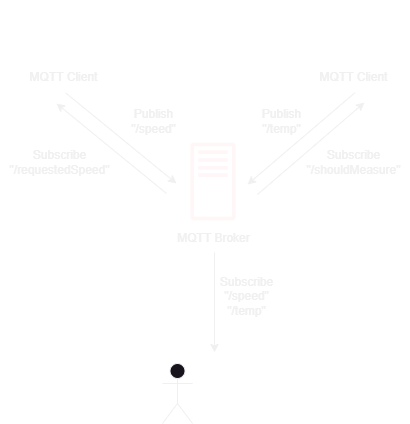
The little guy monitoring the data on his laptop sends a message to the broker, saying that he wants to listen to “/speed” and “/temp”, which are being posted to the server by the car and temperature sensor respectively. Then, every time the car or temperature sensor posts a new value to its “topic”, the MQTT broker sends a packet to the laptop, notifying our little stick man that there are new values.
Why MQTT For this Project?
Overall, this project was a learning tool for MQTT and I would not suggest using MQTT to control custom robotics. I found during this project, that the latency involved with all the network transfers was too much to feel like you were controlling the robot in “real-time.”
MQTT is far better suited for situations like distributed networks of smart sensors, that all need to post to a central data source. Live control is not it’s best quality.
How Does MQTT Work in this Project?
Chapster lives on a network, connected by WiFi through the on-board ESP32. On the same network as Chapster, there is a MQTT broker, running on a RaspberryPi in my case (You can run that client on anything you want, as long as it runs the Mosquitto broker). The MQTT client on the ESP32 on-board Chapster connects to the broker on the RaspberryPi in order to subscribe to the CHAPSTER topic. The Chapster interface software located in the GitHub repository submits commands to these topics that the robot will listen too.
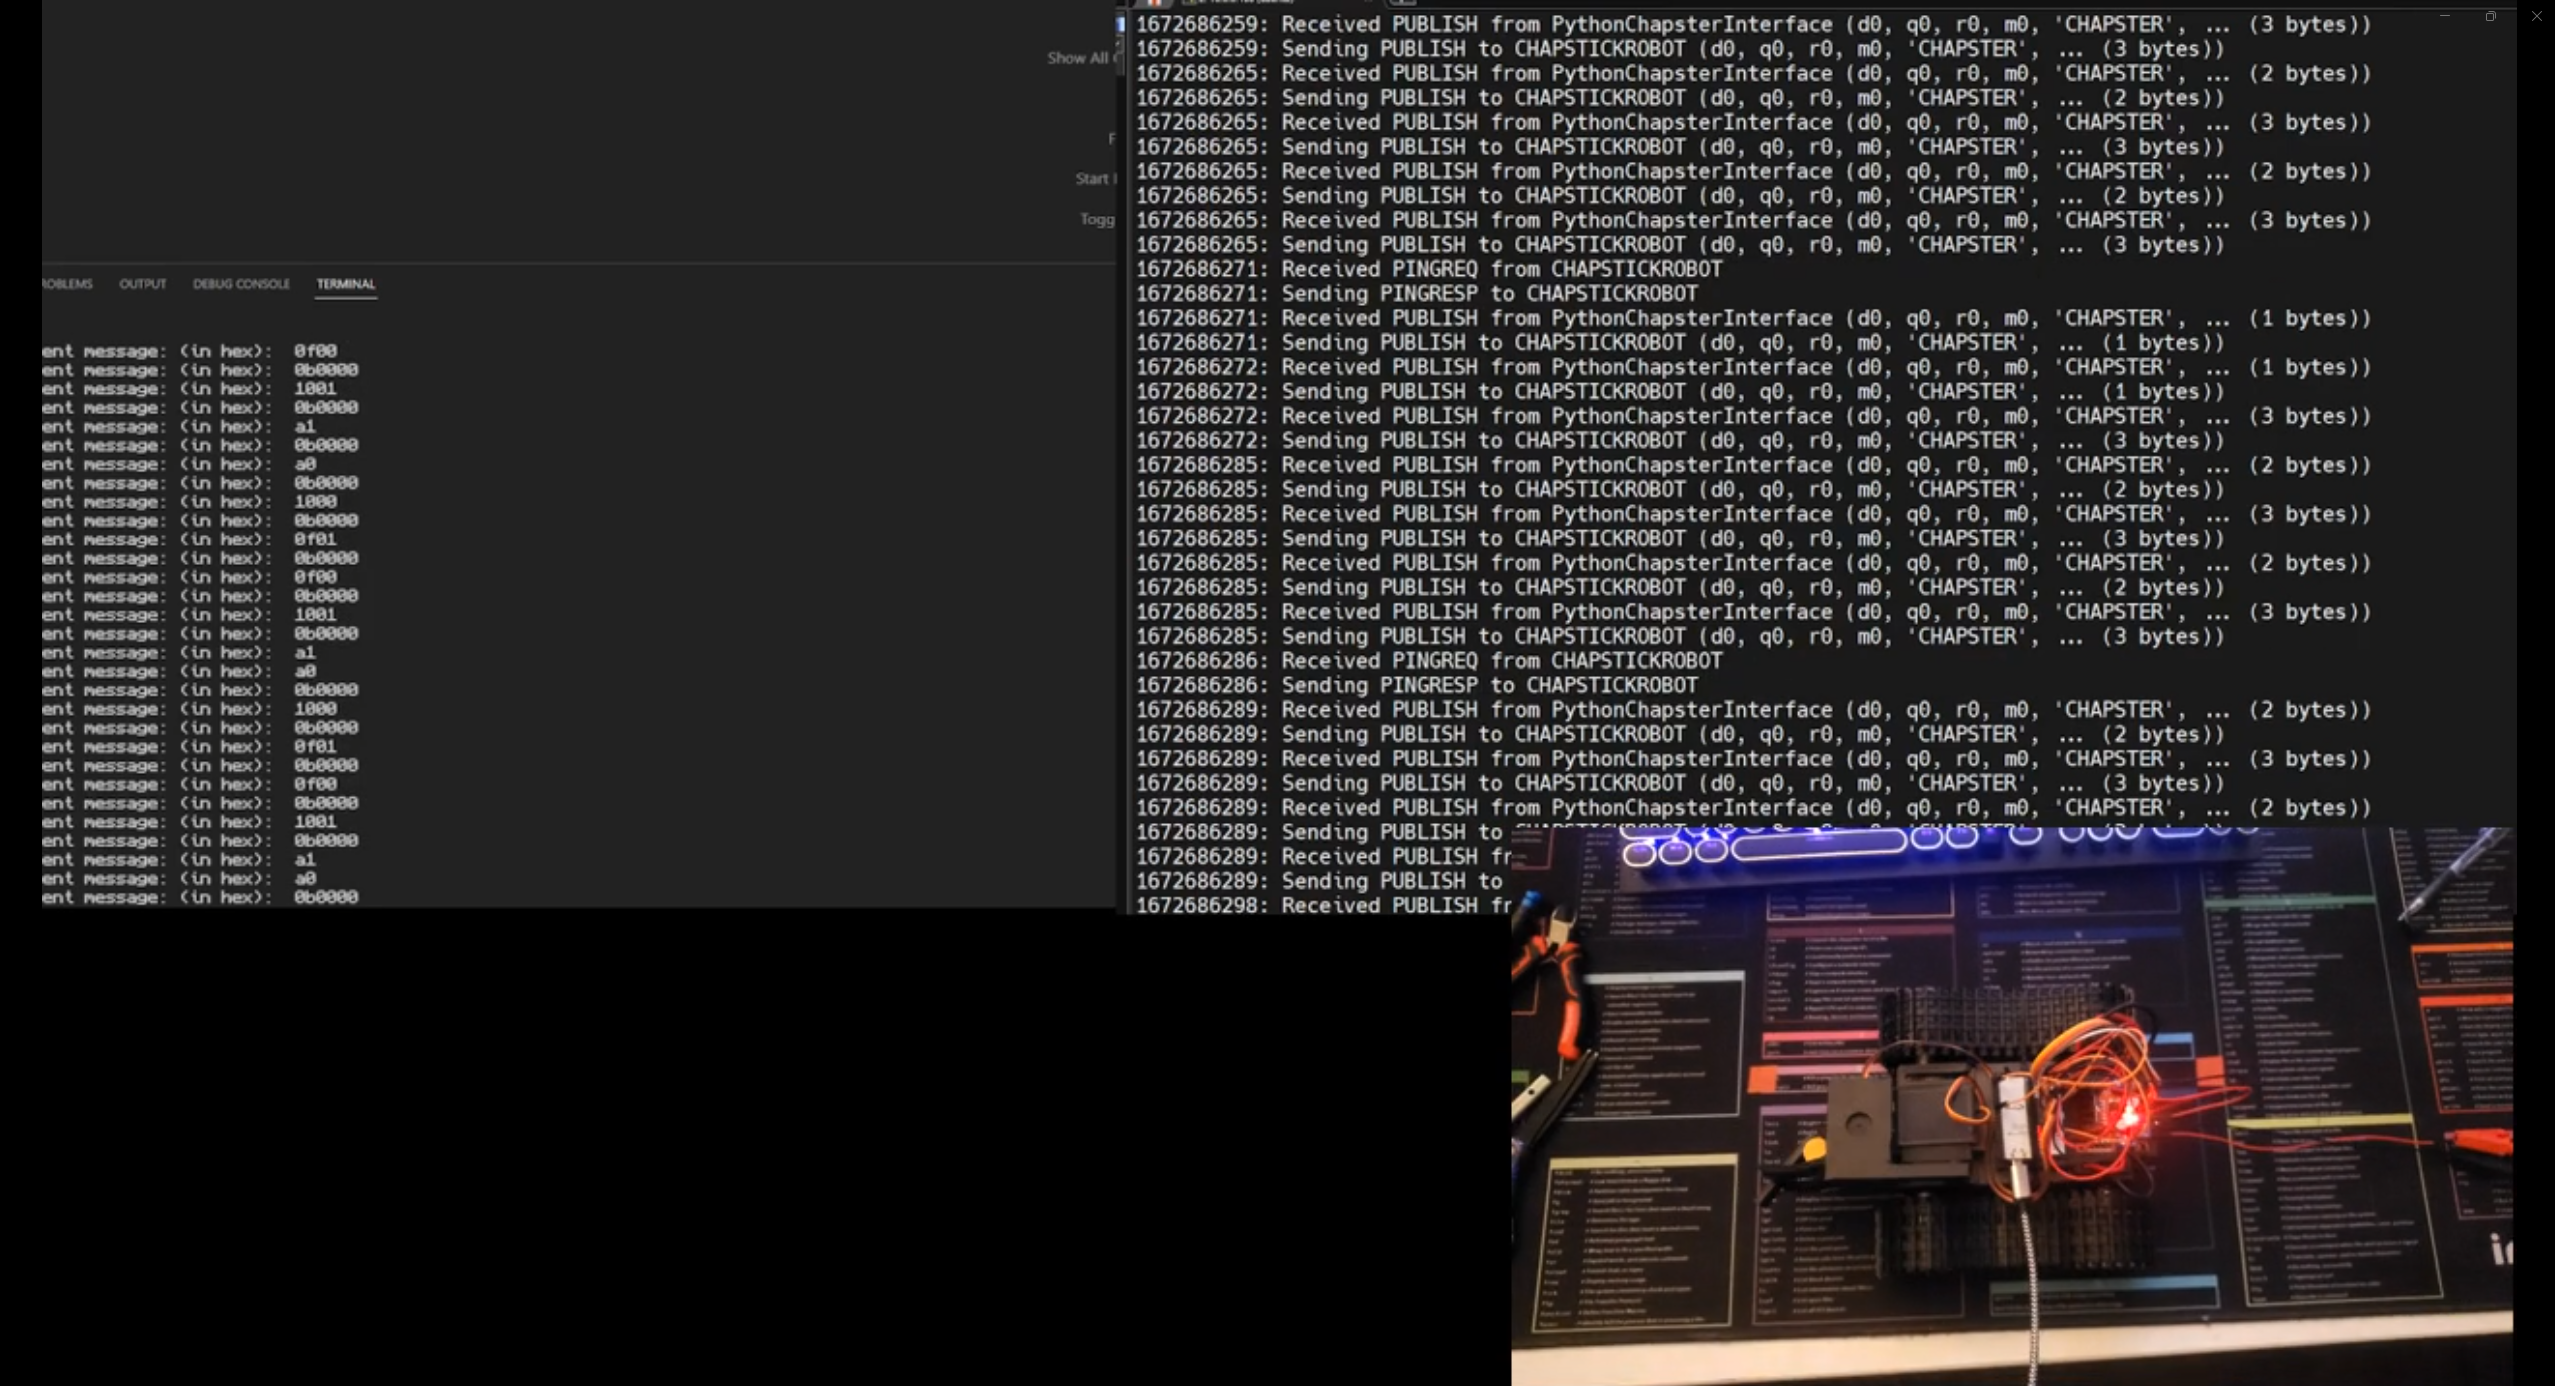
For example, if a client wanted the robot to move forward, the client would “publish” a move forward command to the robot:
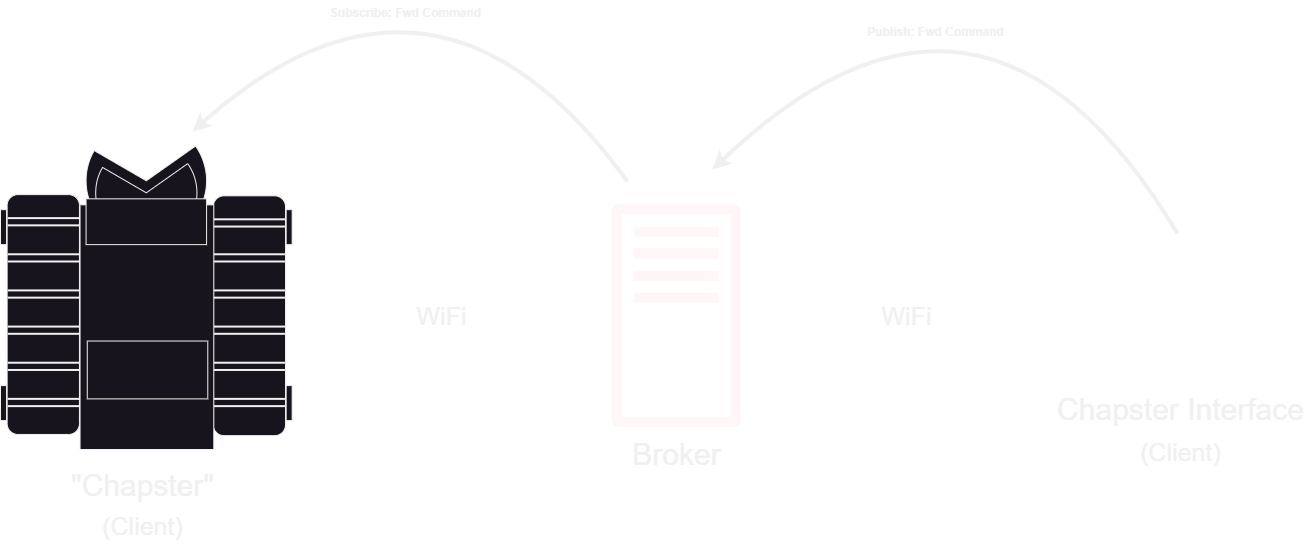
The robot would have already subscribed to the CHAPSTER topic, and will react to any messages published to that topic. In this case, the robot would move forward:

Note the beauty of MQTT is that the robot would be free to disconnect, and re-connect as it pleases, without violating the MQTT protocol:

This could be useful if Chapster could drive autonomously, and periodically connect and receive commands from the broker on what to do next. For example, a warehouse robot could receive a command over MQTT that could say: “Go get package 1,” and the robot would autonomously do so, and it would be free to roam networks as it pleased.
This Project, in a Nutshell
The Chapster project was a great introduction to MQTT for me, personally. I learned that MQTT is best for low-throughput scenarios where clients aren’t expecting real-time data. I would highly recommend a project similar to this to anyone wanting to learn more about robotics or IoT.
Last Updated: 2024-05-19